TUI Walkthrough
Layout editor
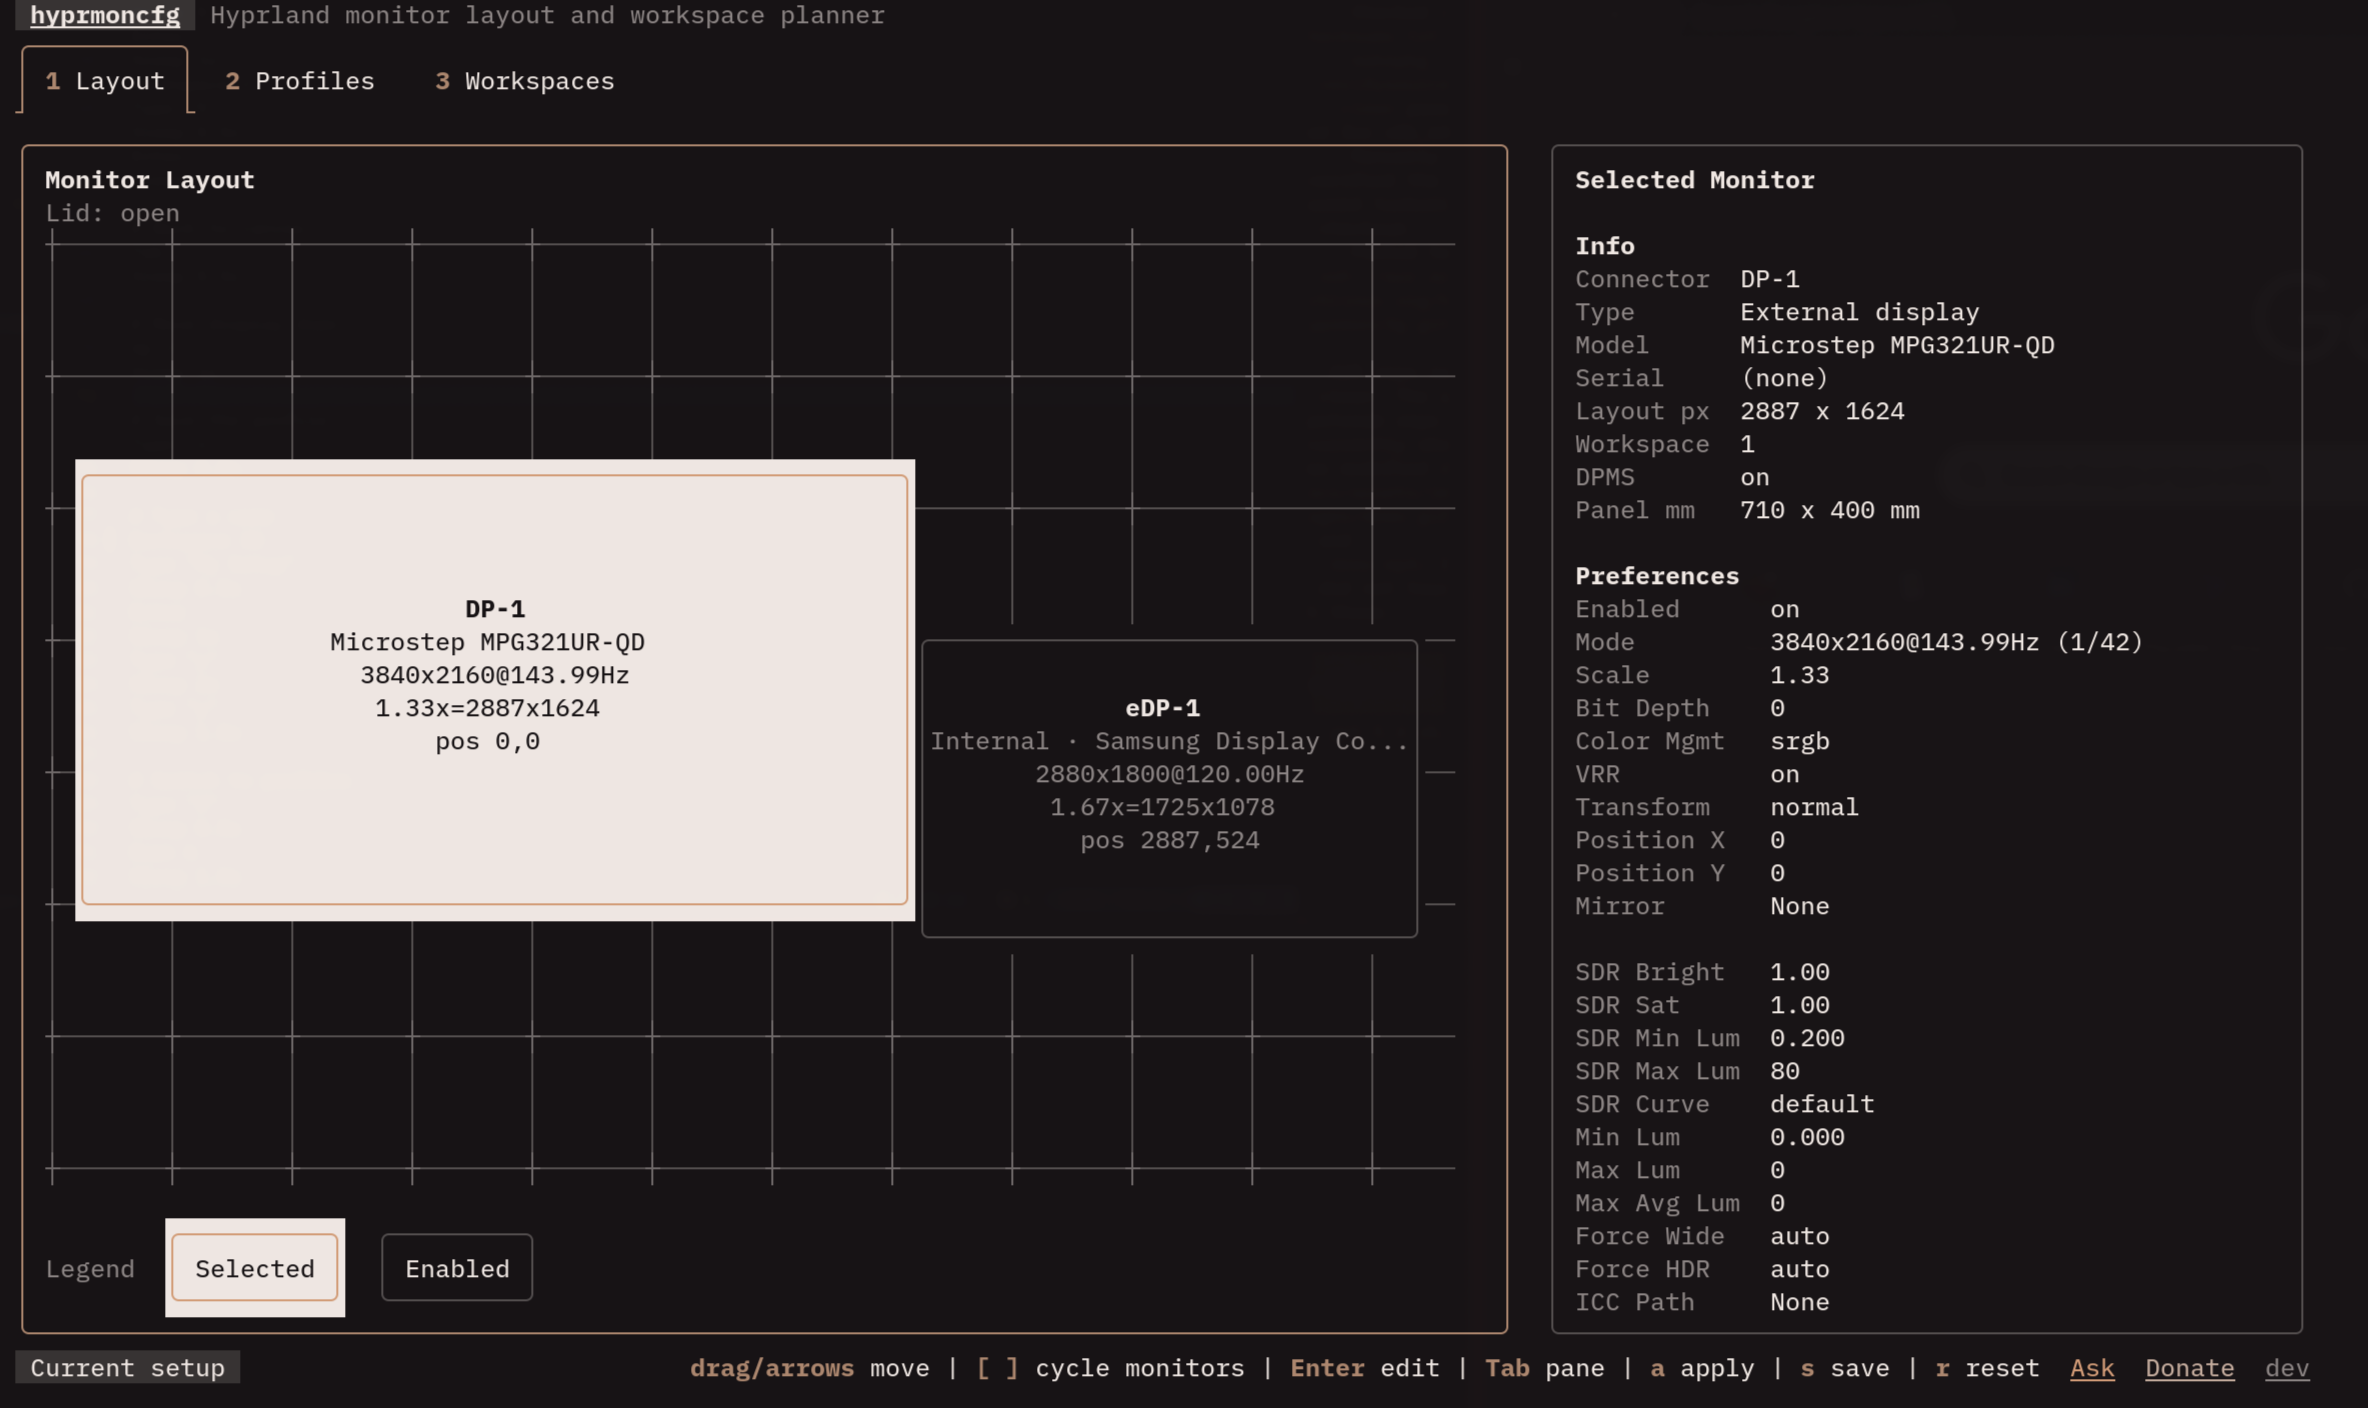
When you launch hyprmoncfg, you land on the layout tab. This is where you arrange your monitors and tune their settings. The screen is split into two panes:
- Left: a canvas showing your monitors as draggable rectangles, positioned the way Hyprland currently sees them
- Right: an inspector showing every property of the selected monitor – resolution, scale, position, transform, VRR, and more
Drag monitors on the canvas to reposition them. The inspector updates in real time. When you need pixel-perfect placement, use the Position X and Position Y fields in the inspector instead of dragging.
While the TUI is open, it also refreshes live monitor state in the background. Plugging or unplugging a monitor, docking, undocking, or changing lid state reloads the editor so the canvas matches the current hardware.
Main controls
| Key | Action |
|---|---|
1 2 3 |
Switch tabs (layout, profiles, workspaces) |
a |
Apply current draft or selected profile |
s |
Save current draft as a named profile |
r |
Reset from live Hyprland state |
q |
Quit |
Canvas controls
| Input | Action |
|---|---|
| Mouse drag | Move the selected monitor |
| Arrow keys | Move by 100px |
Shift + arrows |
Move by 10px |
Ctrl + arrows |
Move by 1px |
[ ] |
Cycle selected monitor |
Tab |
Switch focus between canvas and inspector |
Snap hints appear while dragging, but keyboard movement is freeform – you’re never forced into a grid.
Inspector
Press Enter on any inspector field to edit it:
- Mode opens a scrollable picker with every supported resolution and refresh rate
- Scale, Position X, Position Y accept typed numeric values
- Transform, VRR cycle through their options with Enter or scroll
- Mirror lets you mirror the selected monitor to any other connected display. For a crisp image, set the mirrored monitor’s Mode to match the source resolution. If the resolutions don’t match, Hyprland upscales the image, which looks blurry
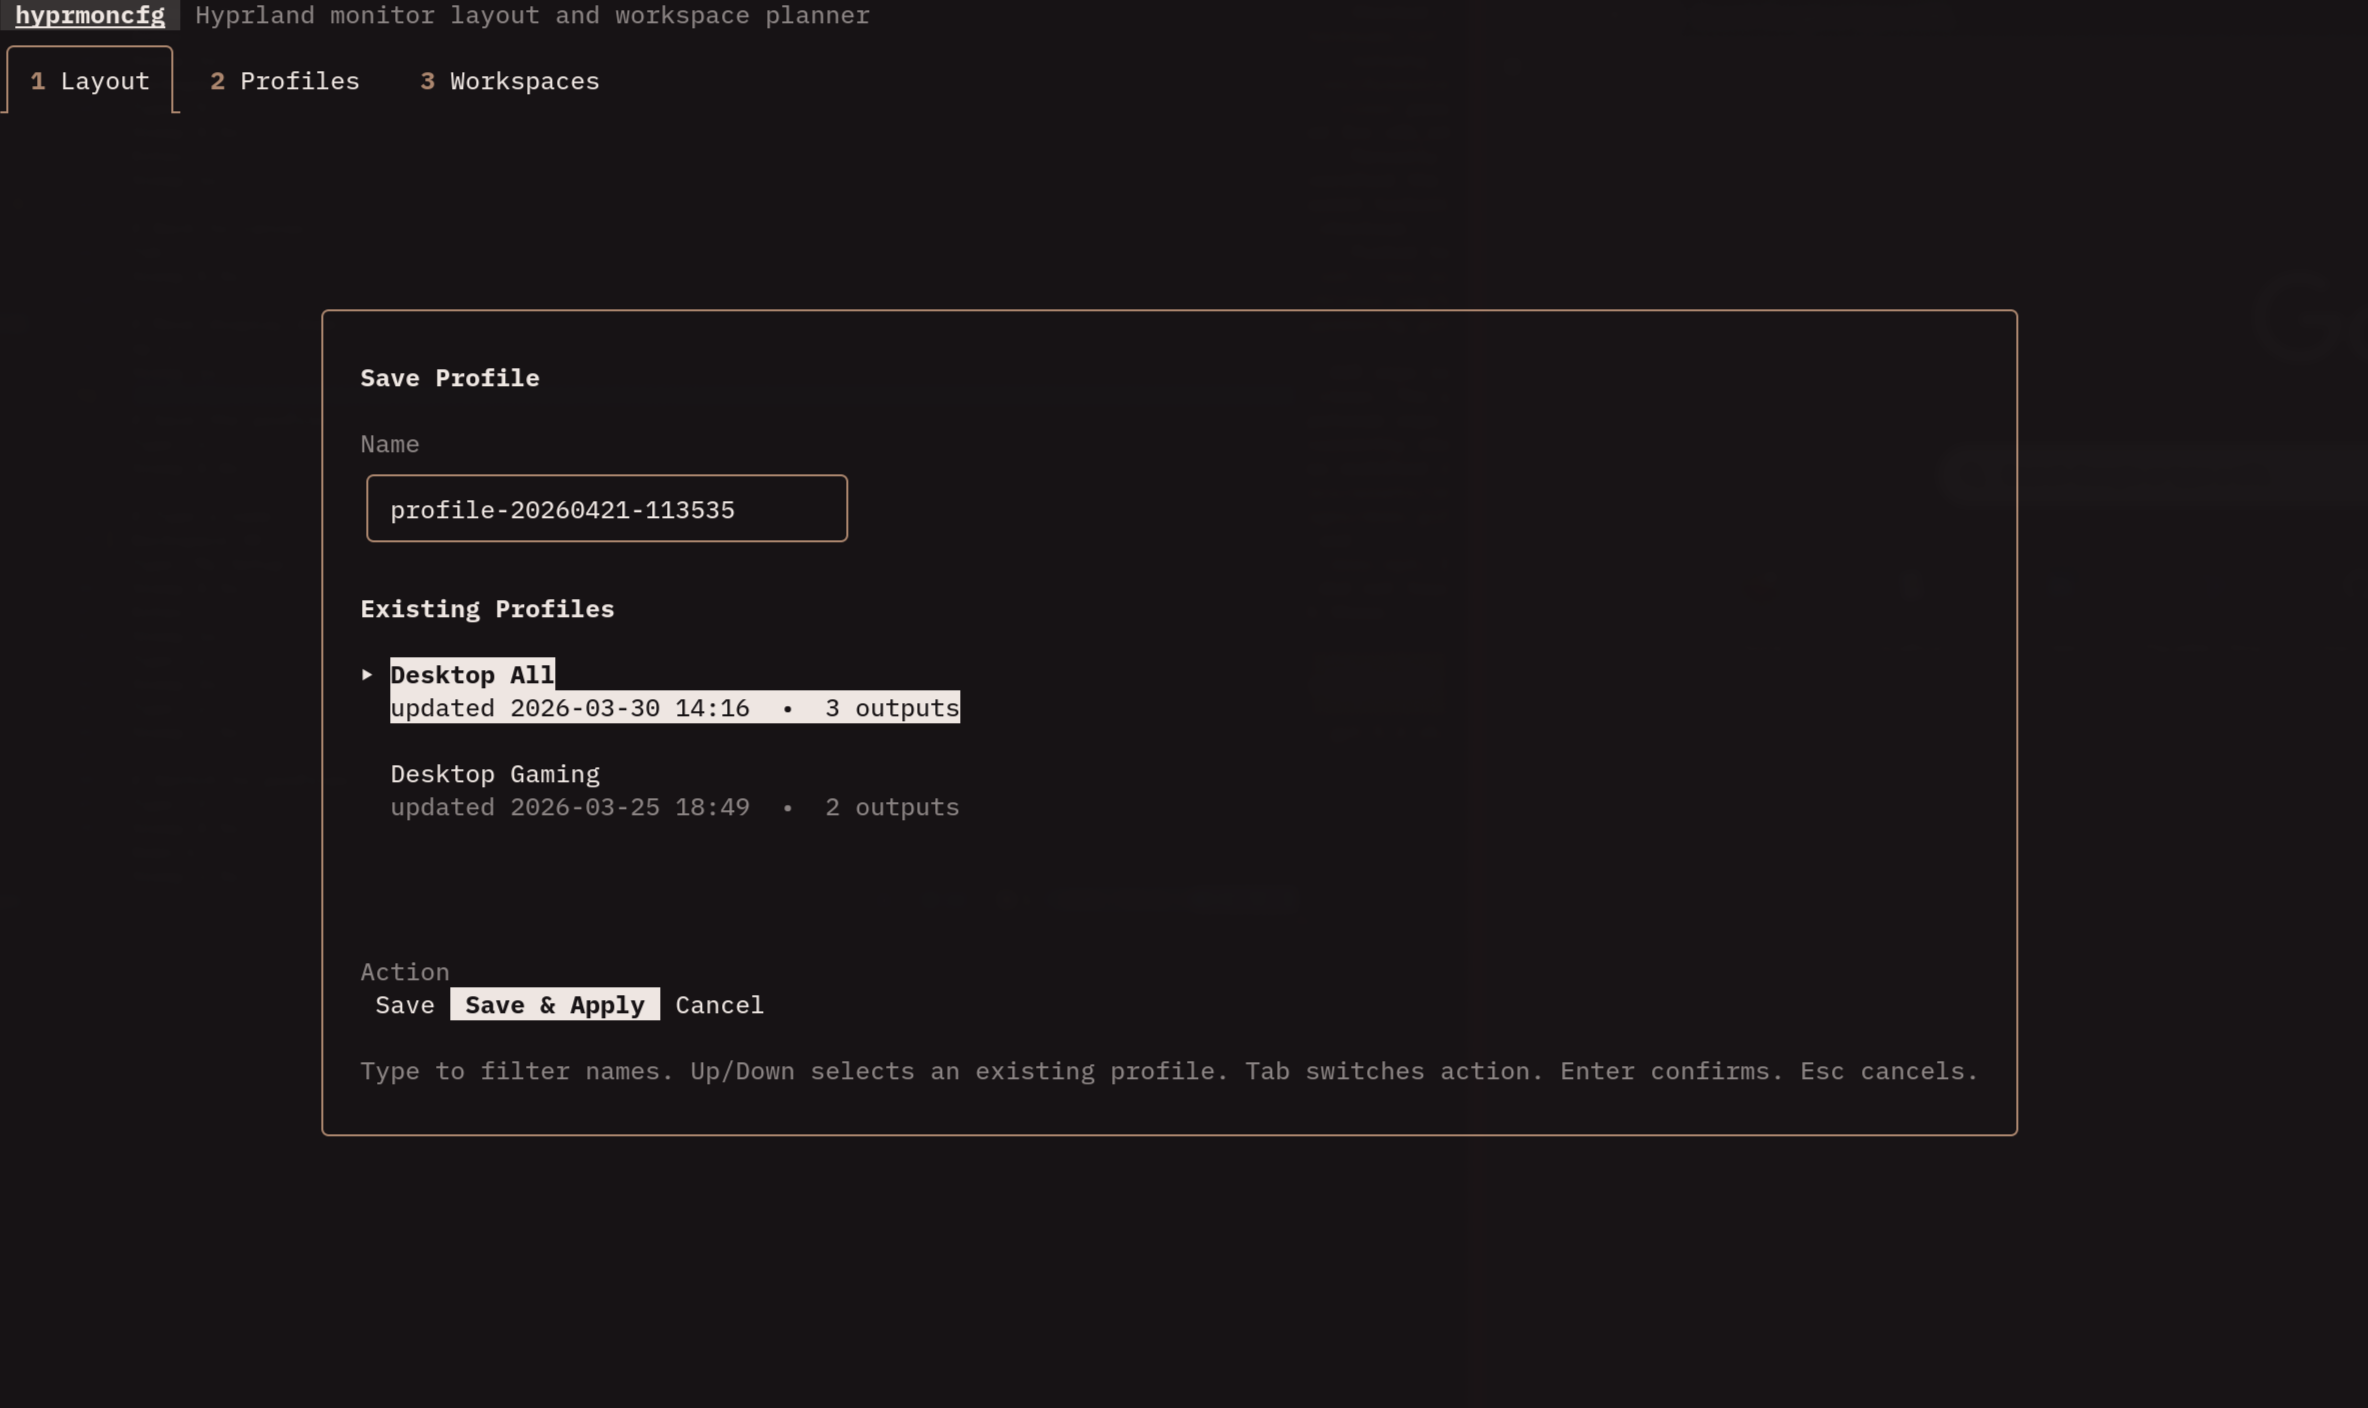
Save dialog
Press s from the layout tab. You’ll see a text input and the list of existing profiles.
- Type to filter existing profiles
- Arrow keys to select one (overwrites after confirmation)
- Type a new name and press
Enterto create a fresh profile
Workspace planner
The third tab lets you distribute workspaces across monitors. Pick one of three strategies:
| Strategy | What it does | When to use it |
|---|---|---|
sequential |
Groups workspaces in chunks (e.g., 1-3 on monitor A, 4-6 on monitor B) | You think of each monitor as having “its own” workspaces |
interleave |
Round-robins workspaces across monitors (1 on A, 2 on B, 3 on A, …) | You want next/previous workspace to alternate screens |
manual |
You define explicit rules for each workspace | You need full control over exactly which workspace lives where |
You can also configure:
- Workspace rules on/off – disable them entirely if you manage workspaces yourself
- Max workspaces – how many workspaces to generate rules for
- Group size (sequential only) – how many consecutive workspaces to assign to each monitor before moving to the next. With 2 monitors and a group size of 3, monitor A gets 1-3, monitor B gets 4-6, and so on
- Monitor order – which monitor gets the first batch of workspaces. Drag to reorder
The workspace plan is stored inside each profile. When the daemon applies a profile, it applies workspace rules too – layout and workspace assignment in one shot.
Laptop lids
Internal laptop panels are marked as internal displays in the layout view. The TUI also shows the current lid state when it is available.
Profiles are still profiles for the attached monitor setup, not separate open-lid and closed-lid variants. When the lid is closed and an external monitor is connected, applying a profile forces internal laptop-panel outputs off for that apply and moves workspace rules away from the forced-off panel.