Getting Started
Install
Arch Linux
Stable release from AUR:
yay -S hyprmoncfg
Latest main from AUR:
yay -S hyprmoncfg-git
The package installs:
hyprmoncfgto launch the TUI or use the CLIhyprmoncfgdfor automatic profile switching- a user service unit at
/usr/lib/systemd/user/hyprmoncfgd.service
Void Linux
Add Blackhole-vl (Unofficial Repo) to your package manager:
echo "repository=https://mirror.black-hole.dev/$(uname -m)/" | sudo tee /etc/xbps.d/20-repository-extra.conf
Install package with:
sudo xbps-install -S hyprmoncfg
The package installs:
hyprmoncfgto launch the TUI or use the CLIhyprmoncfgdfor automatic profile switching
Build from source
git clone https://github.com/crmne/hyprmoncfg.git
cd hyprmoncfg
go build -o bin/hyprmoncfg  ./cmd/hyprmoncfg
go build -o bin/hyprmoncfgd ./cmd/hyprmoncfgd
Install to ~/.local/bin
install -Dm755 bin/hyprmoncfg  ~/.local/bin/hyprmoncfg
install -Dm755 bin/hyprmoncfgd ~/.local/bin/hyprmoncfgd
Configure Hyprland
hyprmoncfg needs:
- A running Hyprland session
hyprctlinPATH- A Hyprland config that includes hyprmoncfg’s generated monitor file
For legacy hyprlang configs, most setups already have this in ~/.config/hypr/hyprland.conf:
source = ~/.config/hypr/monitors.conf
For Hyprland 0.55+ Lua configs, add this to ~/.config/hypr/hyprland.lua instead:
require("monitors")
Hyprland does not read the generated monitor file automatically, so hyprmoncfg checks this before writing. If the include line is missing, it refuses to write and tells you what to fix.
You do not need to create monitors.conf or monitors.lua yourself. hyprmoncfg creates the active generated file when you apply your first profile, then rewrites it on each apply. Keep unrelated Hyprland settings in other included files.
If your config files live somewhere other than the defaults:
hyprmoncfg --monitors-conf /path/to/monitors.conf --hypr-config /path/to/hyprland.conf
hyprmoncfg --monitors-conf /path/to/monitors.lua --hypr-config /path/to/hyprland.lua
Create your first profile
Launch the TUI:
hyprmoncfg
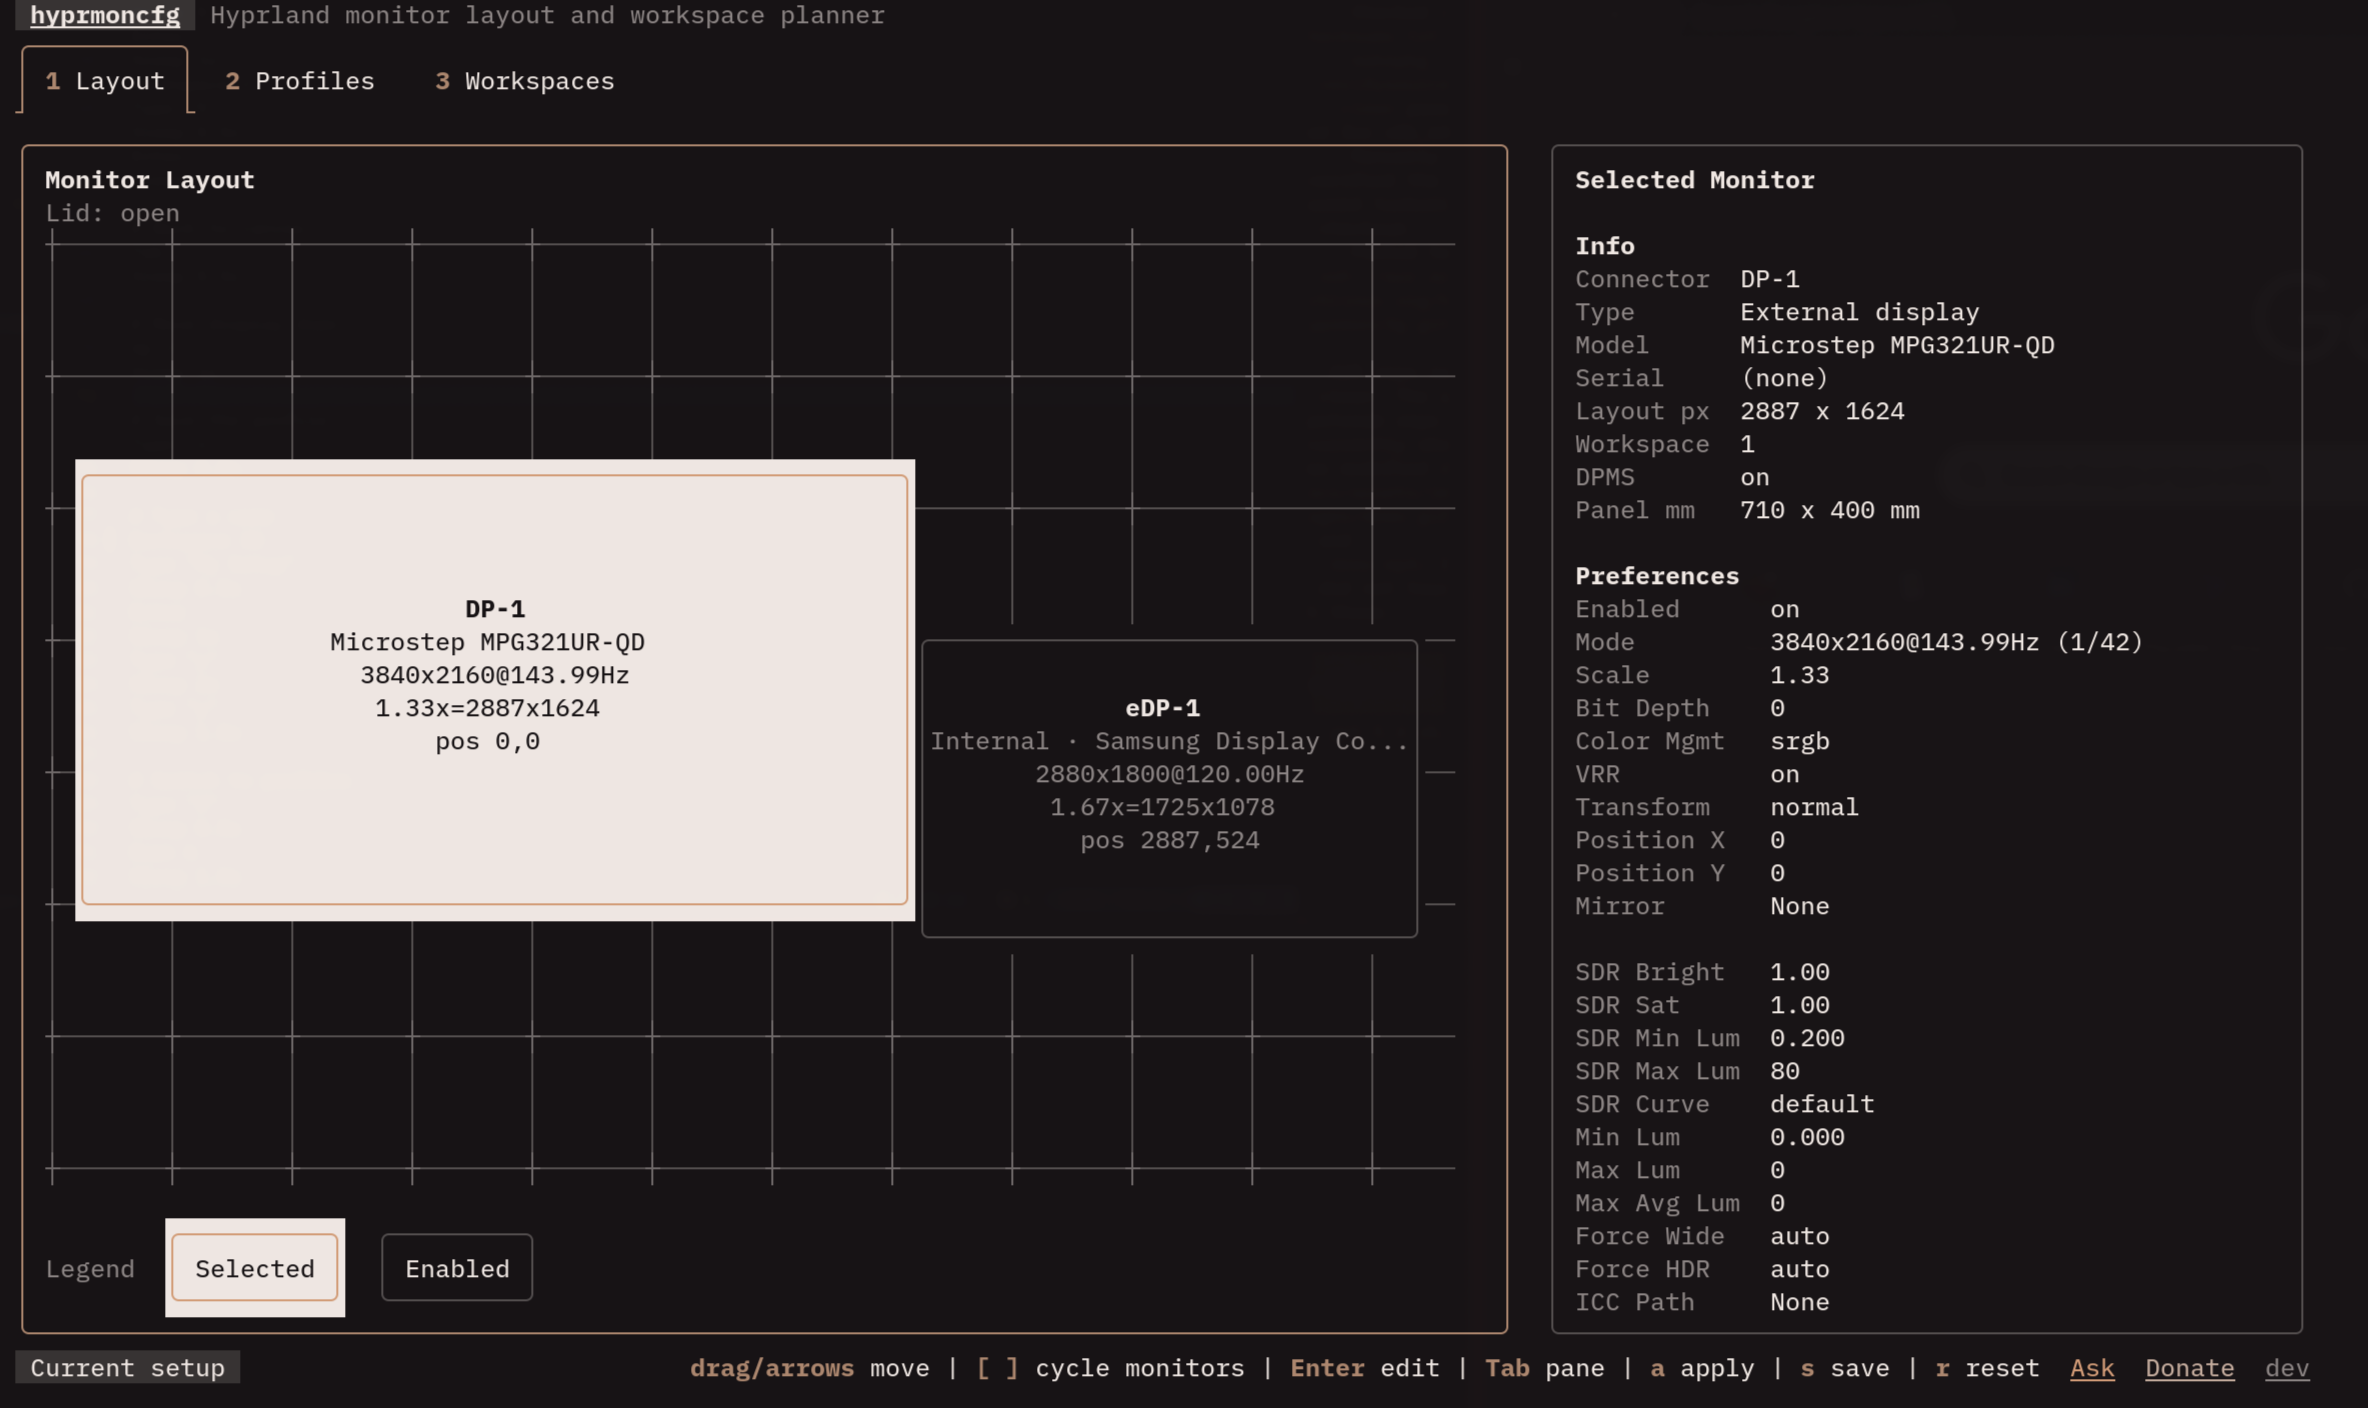
You land on the layout tab. The left side shows your connected monitors as rectangles arranged the way Hyprland currently sees them. The right side is an inspector showing every property of the selected monitor – resolution, scale, position, refresh rate.
Drag monitors on the canvas to rearrange them. Click on the inspector fields to change resolution, scale, or position. When the layout looks right:
- Press
sto save - Type a name like
deskorhome-office - Press
Enter
That’s it. Your monitor layout is now a named profile.
Apply a saved profile
hyprmoncfg apply desk
Your monitors rearrange immediately, and a 10-second countdown starts. If the layout looks right, press any key to confirm. If something looks wrong, just wait – it reverts automatically. This is the same safety mechanism you see on TVs and projectors when you change the resolution.
For scripts and automation, skip the countdown:
hyprmoncfg apply desk --confirm-timeout 0
Enable automatic switching
The daemon watches for monitor changes and applies the best matching profile automatically. Set it up once and forget about it.
Clean Up Before You Enable The Daemon
hyprmoncfgd scores every profile in ~/.config/hyprmoncfg/profiles/. Old experiments, duplicate layouts, and half-finished saves are part of matching until you delete them.
Before you turn on automatic switching, make sure your profile library reflects real setups you actually want auto-applied:
- Save one profile for each real desk, dock, projector, or travel setup you use
- Delete throwaway profiles you created while experimenting
- Re-save the profile you actually use instead of keeping old variants around
On laptops, you do not need a separate closed-lid profile. Save the profile for the monitors you attach at that desk. When the lid is closed and an external monitor is connected, hyprmoncfg forces the internal laptop panel off for the apply and moves workspaces away from it.
If you installed from AUR:
systemctl --user daemon-reload
systemctl --user enable --now hyprmoncfgd
If you installed from Blackhole-vl (Void Linux), autostart the daemon from your Hyprland config. In legacy hyprland.conf:
exec-once hyprmoncfgd
In hyprland.lua:
hl.on("hyprland.start", function()
  hl.exec_cmd("hyprmoncfgd")
end)
If you built from source and installed into ~/.local/bin:
mkdir -p ~/.config/systemd/user
cp packaging/systemd/hyprmoncfgd.local.service ~/.config/systemd/user/hyprmoncfgd.service
systemctl --user daemon-reload
systemctl --user enable --now hyprmoncfgd
Now when you plug in a monitor, unplug one, dock your laptop, or close the lid, the daemon finds the profile that best matches your current hardware and applies it. No interaction needed. The packaged systemd service works with both config formats because the daemon detects the active Hyprland config and writes monitors.conf or monitors.lua through the same apply engine as the TUI.
If the daemon ever applies a layout you didn’t expect, the most common cause is stale or duplicate profiles in ~/.config/hyprmoncfg/profiles/. The daemon scores every profile it finds, not just the ones you remember saving. Delete old experiments, keep one profile per real setup, and the matching becomes predictable. See Daemon Behavior for the full scoring breakdown.
Add profiles to your dotfiles
Profiles are stored in ~/.config/hyprmoncfg/profiles/. Each profile has a canonical JSON file plus generated .conf and .lua sidecars, so you can keep the layouts as plain Hyprland snippets even if you stop using hyprmoncfg. Add the whole config directory to your dotfile manager and your layouts roam across every machine.
With chezmoi:
chezmoi add ~/.config/hyprmoncfg
Your desk at home, your laptop bag setup, your conference projector layout – all versioned, all portable. The daemon on each machine picks the right profile based on what’s actually plugged in.
You never commit the active ~/.config/hypr/monitors.conf or ~/.config/hypr/monitors.lua. You commit your profiles. hyprmoncfg writes the active generated monitor config for you.
Next steps
- TUI Walkthrough – learn the full editor interface
- Daemon Behavior – understand how auto-switching works
- Dotfiles Integration – set up profile portability
- Command Reference – every flag and subcommand